As drummers, we have all sat at our kits, sticks in hand, anxiously awaiting to wail away while our bandmates tune their guitars. Our time has come. Tuning your drums is key when trying to achieve an even signature sound.
If searching for the right information, for example on forums like Ultimate Metal or Gearspace, did not lead you to anything, then this article is for you.
I always make sure that my kit is maintained and well tuned otherwise the rust we sometimes experience as players will transfer to the sound of our set up.
Scientists once put mice in a maze and exposed them to loud heavy metal music. They didn’t finish the maze, they killed each other.
— Fact (@Fact) December 24, 2020
Here we will lay out the process for how to tune your drums for metal. I will walk you through the correct approach when it comes to:
- Proper tuning gear
- Make up of a drum
- The right selection of skins
- How and why to keep it tight
As mentioned above we have spent a good portion of our jam sessions waiting to play, so let’s not waste any time and get into it.
Tools to Tune-Up
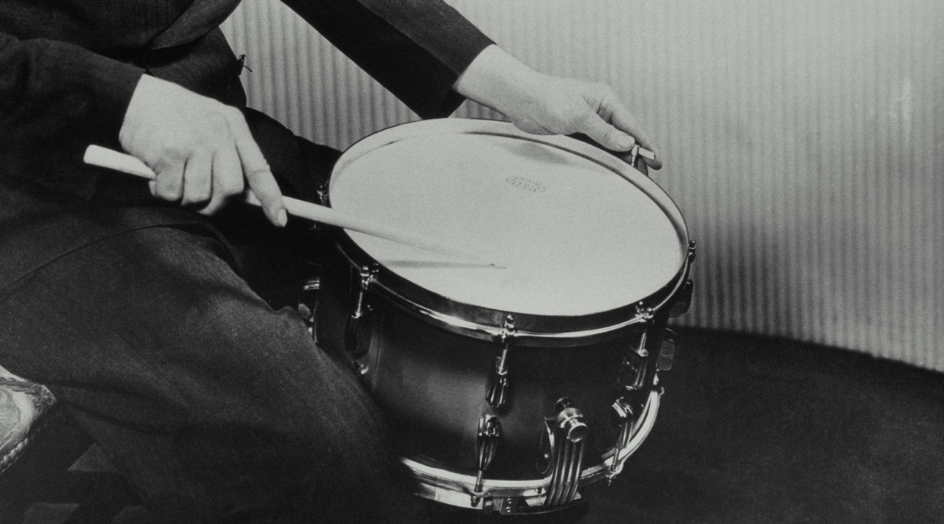
The required tools for tuning your kit are pretty basic. A tuning key, a pair of sticks, and a trained ear for pitch. A tuning key is used to apply pressure to the rods which will increase or decrease the pressure placed on the head.

You may also want to have some muffling accessories on hand as well like moongels, or the traditional approach, a folded piece of paper towel and some duct tape. This will allow you to modify your sound after tuning to your desired pitch.
The Proof Is in the Percussion
The material, width, depth, bearing edges, and reinforcement hoops all play a factor in your overall. For example, the depth of a shell determines such things as sustain and resonance when the head is struck.

The deeper the shell the longer the sound and darker sounding pitch it produces. Whereas a more shallow shell will give off a shorter and higher pitch “cracking” sound.
A bearing edge is a circular rim that separates the shell from the head and is usually set at a 45-degree angle. Most drummers will go for a sharper edge to get a pronounced sound.
Last but not least reinforcement hoops are an added rim of wood placed on the top or bottom of the shell. They are affixed to the head lending itself to a more upfront and sharper finishing tone.
Are Two Heads Better than One?
As stated in this blog post from Drum Ambition there are four main types of heads. Single-ply, double-ply, coated heads, and pre-dampened are the standard for thickness and sound.
What are Drum Heads, and which ones are best suited for you? This article sets you on the way to establishing your sound! https://t.co/nU98juSnjS pic.twitter.com/pI5ACRhxbU
— Drum Ambition (@DrumAmbition) June 28, 2018
Single-ply gives off a more high-pitched tighter sound.
Double-ply drums have two layers of skins and are often the preferred type of head for anyone wanting to push their kits sound to the nosebleed section.
Coated heads can be both single or double-ply and are sprayed during the manufacturing process to deepen the resonance. A double-ply coated head is best for drummers looking to go below and beyond when it comes to their drum sound.
A pre-dampened head is treated during factory production to have a warmer low-end tone and increased attack. Dampening a standard drum head after the fact is the process of adjusting the resonance by either placing a gel or canvas over the head.
Don’t Be Frightened to Tighten
Each drum in your kit is designed to produce a different sound. Whether it’s your snare, toms, or kick drum they should all be tuned appropriately and in concert to achieve a unified wall of sound and distance. When learning how to tune your drums for metal, the name of the game is dark, deep, and full-bodied attack.
Think of your car getting a tune-up. The mechanic goes through all the systems of the engine, fluid levels, even listening for any out-of-place squeaks, or knocking sounds. The drums are no different as we must approach tuning each drum of the kit in unison and with an equal method of approach.

You must tighten each rod in an order that does not throw off your previous “tap and tune” testing. Rather than going around the head in a clockwise succession and tuning each rod with your key, you have to tighten the rods directly across from each other to match pitches while doing adjustments.
Let’s break down best practices when it comes to each drum.
Snare

The loudest and most articulated member of the drum family, which means it requires the most attention to detail while tuning.
Although there is no “one pitch” recommended for a snare you will tune it to your personal preference.
The goal when learning how to tune your drums for metal the snare should have a full-body attack sound with very little sustain.
Kick Drum

When tuned correctly, the kick drum will deliver the deepest and most heart pounding sound from your kit. Once tuned to your desired sound you begin to adjust the overall sound by either playing some blankets or a dampening tool in or on the kick drum.
Again this all comes down to personal preference. The pedal you use also will be a determining factor for the overall sound it will produce. It should be low, but tight enough that the head is not showing any visible wrinkles.
Toms

On a standard kit you are usually working with 2-3 toms, including your floor tom. Start with the small-sized tom as the medium tom and floor can be measured by being tuned lower.
A great way to obtain a long-lasting resonance for that sought-after dark drum sound is, you guessed it, tweak the resonant head of the tom which is the head underneath the shell.
A tip from the Barking Drum Blog, “Double ply will give a longer sustain which can be nice for larger drums like floor toms.”
Start by matching the tuning of the batter head (top head) and then play around with a lower or higher tune on the resonant. This will punch up your toms and leave a lasting effect on the mandatory metal solos.
Take It from Me
Over the years I have acquired some helpful tips for how to tune your drums for metal more seamlessly and efficiently. These come in handy especially when you are on the road and snap a head and need to replace it with the speed and ferocity of a Nascar pit crew.
- Make you have two tuning keys on hand. Rather than having to keep bouncing back and forth from the adjacent tension rod you can tighten and loosen as needed without hopping around too much.
- Always re-check your tuning after breaking down and moving your set. You will be sure to find some needed adjustments after your kit has been loaded and unloaded while in transit to a show.
- Most of your bandmates are no strangers to tuning up their instruments. Many hands make light work so employ either a bored guitar or bass player to lend a helping hand.
Learn More
- 14 heavy metal drumming tips and techniques →
- Tuning chart →
- Tuning drums for different styles and genres →
- Mobile apps to tune your drum set →
Conclusion
Achieving a well tuned sound for your kit is the difference between standing out for precision rather than being out of place. It’s a practice that we as drummers must adapt to keep our drums sounding cohesive and on point.
You get back what you put into your drums and by making sure you follow these steps to properly tune up your set you will be sure to deliver a larger than life signature sound for metal that will make your bandmates realize that it was worth the wait.

